
 Been woodworking on Farmhouse style furniture for a few years, and this week I spent some time designing my own chair for my outdoor patio! It is barstool height with a seat hight of 29" inches and a footrest height of 17" inches. The back of the seat inclines around 15 degrees for comfort.
The project took 5 1x4s and 5 2x4s for a project cost of around $50 when you throw in glue and screws, and it took around 4 hours. The reason it went fast is because I spent about 3 days drawing it out in Sketchup and generating the cutlist in advance. I could not be happier with the way it came out and I am sharing the plans for this build below. Please leave a comment for me if you end up using the plan or have any ideas for improvement!
Supplies
For this project you will need the following lumber:
Five (5) 1x4s (3.5” x ¾”)
Five (5) 2x4s (3.5” x 1 1/2”)
Glue, 2 ½” pocket screws, 2 ½” wood screws, 2” wood screws, 1 ½ nail gun nails
Board Cut List and Optimization of Cuts
See the figures below for the cut list and the optimized way to cut to minimize waste.


Build Steps
Step 1 – Connect the back brace to the rear legs with glue and pocket screws facing the inside. Mount the brace flush with the edge of the legs and 7” inches from the bottom as seen in figure 1.

Figure 1
Step 2 – Connect the front brace to the front legs using glue and pocket screws facing the inside face. Mount the front brace flush with the edge of the legs and 10.5” inches from the bottom as seen in figure 2.

Figure 2
Step 3 – Using glue and nails, connect the two leg assemblies together using the 24” 1x4s on both sides as in Figure 3. Make sure the 1x4 is flush on all edges with the leg pieces.

Figure 3
Step 4 – Connect the 30” footstep braces to the leg assemblies using 2 1/2” screws on the inside faces. Pocket holes are not necessary, simply apply glue and screw through the boards to join. The back end of 30” board is flush and even with the back leg brace, and the front of the footboard brace is pushed up flush with the front leg brace with 7.5” inches sticking out from front. All this is shown in Figure 4.

Figure 4
Step 5 – Seat assembly. Build the box as seen in figure 5 using 20.5” pieces for the front and back, and 21” pieces for the sides and center support. Use glue and pocket screws for this assembly.
Figure 5

Step 6 – Mount the seat assembly as shown in Figure 6 24” inches from the bottom using glue and screwing through the box piece into the leg assemblies. No pocket screws needed.
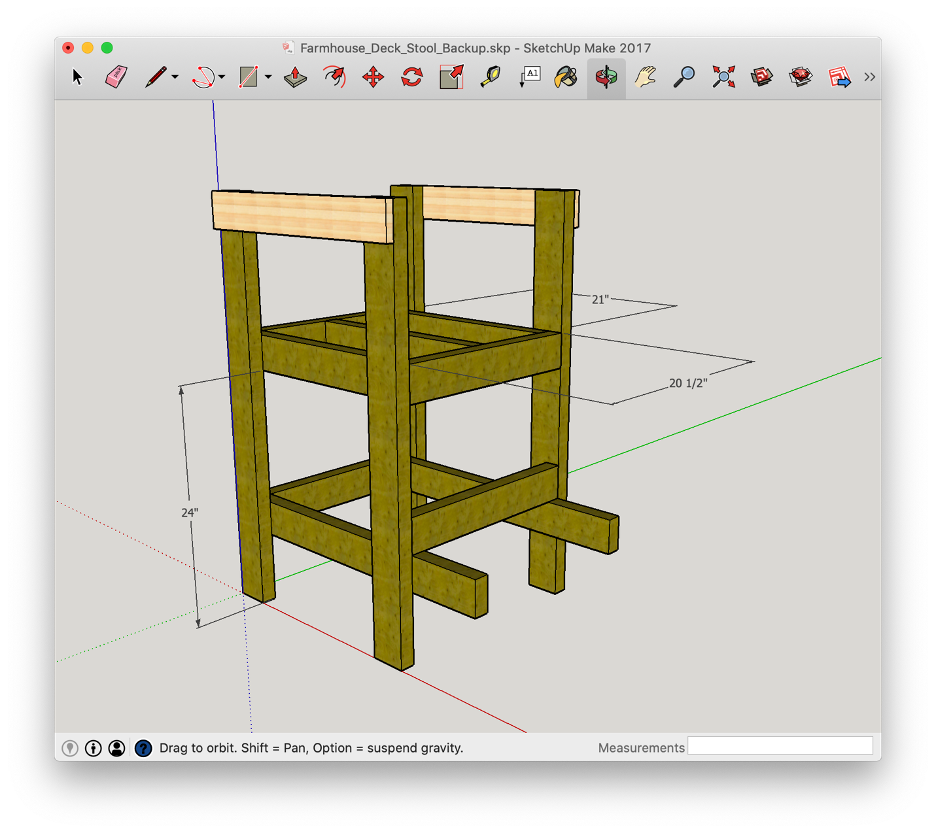
Figure 6
Step 7 – Start gluing and nailing the seat slats onto the chair with the first piece flush against the front edge, with ¼” gaps between as in figure 7. After the 5th slat, connect the pieces that will support the back slats. This may be a little different for each of you as the gaps between slats may vary slightly. The main thing is to tilt the back supports around 15 degrees. Using the dimensions in figure 8, leave about a ½” gap between the last slat on the seat and the bottom of the back support piece and pivot it back until it crosses a line 2 3/8” from the edge of the 2x4 shown in figure 8. You can adjust this angle to your preference. Just make sure it is consistent on both sides. To assemble these pieces, use glue and 1 1/2” nails to hold and then use 2” nails to connect it solidly to the leg structure.


Figure 8
Step 8– Glue and nail the remaining slats to the back braces just installed as well as the two pieces for the foot brace. Again, all gaps should be ¼”. See figure 9 for details.

Figure 9
Step 9 – Final step, using glue and nails attach the arm rests as shown in Figure 10 with the back of the arm rest flush with the back leg, and the front overhanging.

No comments:
Post a Comment
Note: Only a member of this blog may post a comment.